Starting a blog is easy.There are many travel blogs and the best present the unique characteristics and personalities of the blogger.
You may think that it’s easy to start a travel blog and all it takes is some writing, right?
Well, it’s not quite that easy, but it is true that learning how to start a travel blog is not rocket science.
As you begin your travel blog, you may make mistakes, but as long as you learn along the way, you can create a successful travel blog.
#1. Choose Your Niche

While travel is considered a niche, it is a very crowded one. It is better to define a smaller, more focused area of travel and use it as the foundation for your travel blog.
When you are blogging to earn income, you must stand out from the myriad of other bloggers out there.
Choose something you are passionate about because it is always easier to write about things you find enjoyable or love to do. Try and find personal identity within some areas of travel. These could be luxury travel, backpacking, volunteer experiences, movie locations, foods, or any other types of travel.
Check out some of the other travel blogs to see where they focus. Some focus on female solo travel while others focus on art throughout the world. Find something you like and focus on it to create a travel blog.
#2. Choose A Blog Name

This is one of the most important steps in starting your travel blog.
Choosing the right domain name can make or break your travel blog. Your name should be catchy, short and memorable. You should be creative, but don’t make your name too hard to remember or spell.
When you meet people as you are traveling you want to be sure they will remember your URL and blog name. Your domain and blog name will become your brand. Here are some steps to find a good domain name.
- Make a list of possible names.
- Stay away from hyphens since they are harder to remember.
- Buy a .com domain because these are what people think of first.
- Check to ensure your domain name is unique and not similar to something else on the Web.
Once you have decided on a name, you can register your Domain name with Bluehost, which offers attractive deals on Domain name along with free add-ons.
For other options, you can check out this list of the best domain name registrars in India.
#3. Buy A Hosting Plan

While it is possible to start a travel blog using a free blogging platform and free web hosting in India, it is not the best choice. While you will save a few bucks, you will also be constrained by the limitations set by the blogging platform. They can limit what you can post and even what you can say, so it is a much better idea to pay for your own hosting service.
Since there are many best hosting provider in India such as Bluehost, HostGator, pay attention to the packages they offer and their reputation for performance and reliability. Your hosting service’s overall capacity and server performance can impact your site’s loading and processing speed as well as how often if ever it goes down.
Go with a reliable company that has a very high uptime percentage and powerful servers. Since you will probably be using a shared hosting service, ensure the hosting company’s servers are not oversold. Check online reviews for performance, speed, and uptime.
When you choose your hosting service, you will probably be offered various packages. Choose the package which will be best for your situation.
For instance:
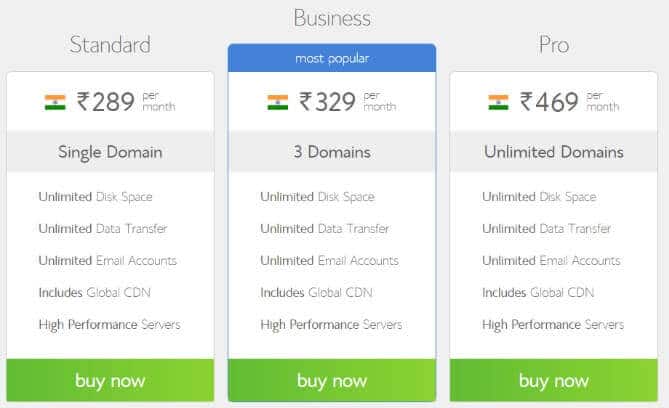
Here is an example of the standard hosting packages offered by Bluehost. To know more about Bluehost, read this comprehensive Bluehost review.
If you are starting an online business, you will not need a lot of services at the beginning. You can probably start with a basic packages that provide you domain registration, unlimited hosting, and unlimited subdomains.
This type of package will allow you to set up other sites should your travel blog really take off.
When you sign up, you will most likely have to commit to a year of services and pay upfront, but since you can get web hosting services for as little as Rs.349/per month, it is not a big expense. You can also get a discount by using promo codes such as Bluehost coupon codes.
A 12-month commitment also provides you enough time to get a feel for travel blogging and see if it’s for you. You should also purchase extra privacy and security protection for your site.
What’s more, check out this awesome video on how to buy web hosting from Bluehost.
Or if you prefer the written version, then here is a step-by-step guide that you can follow.
- Step 1. To get started, click here to open the Bluehost website in a new tab.
- Step 2. Click on “hosting” tab and select the web hosting that you want to purchase
- Step 3. Choose your preferred web hosting plan by clicking on “Buy Now”
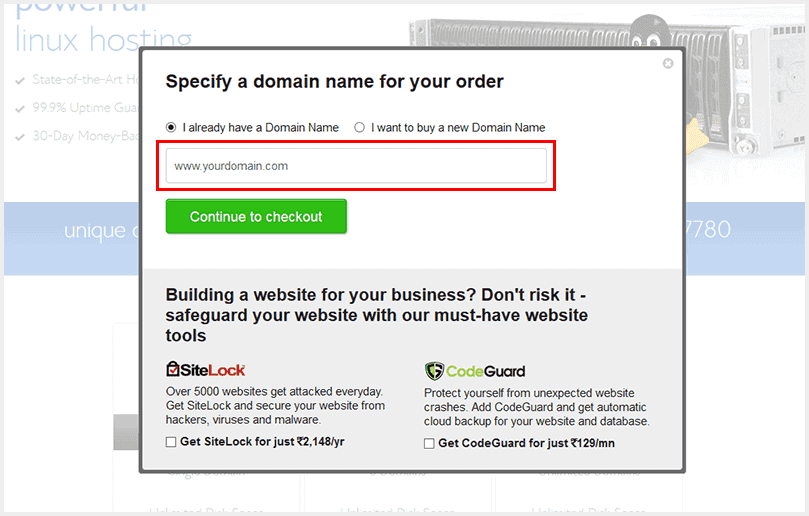
- Step 4. A pop-up window will open up and you’ll be asked to specify your domain name. Click on “I already have a Domain Name” to enter your Domain or select “I want to buy a new Domain Name” to create a new Domain. Click on “Continue to Checkout” to proceed further.
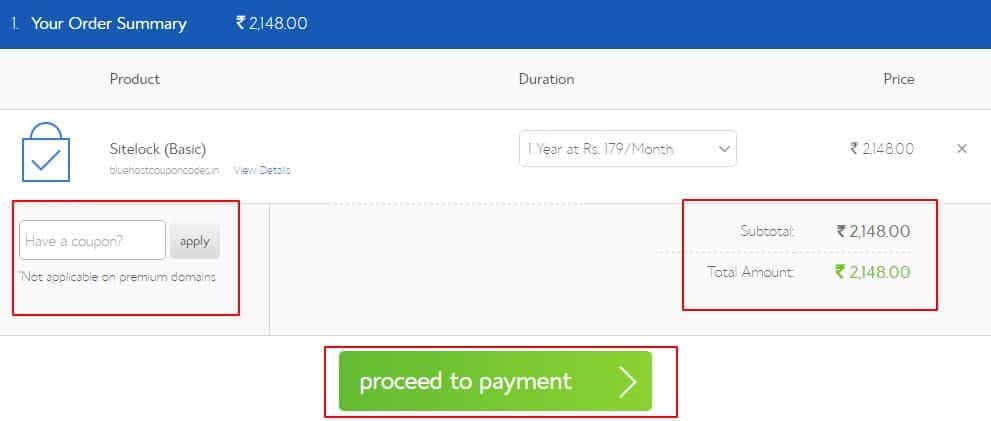
- Step 5. Review your order, enter the Bluehost coupon and once satisfied, click on “Proceed to Payment”


#4. Set Up Your Site
Once you are signed up with a hosting provider, you will get access to the control or cPanel for your account. From here you can install a content management system to your website which you will use for blogging.

The most popular CMS is WordPress which was created and designed specifically for blogging.
Check out this blog on how to manually install WordPress on Bluehost in under 5 minutes.
WordPress also comes with an assortment of plugins and themes to help build your website. You may want to start with a free travel theme from WordPress, although for a few dollars you can purchase a premium theme designed specifically for travel blogs. These themes include the elements you will need to create an attractive site, including templates, colors, and fonts.
Here are certain WordPress plugins that will make your blogging experience better.
- WordPress SEO by Yoast is a great plugin that helps set your site up for search engine optimization. This plugin combines several different elements of SEO, including sitemaps, permalinks, meta robots tag, indexation, internal links, RSS, and more. This plugin helps you structure your site so that Google can find & crawl it and then properly index it. This will help improve your search engine rankings.
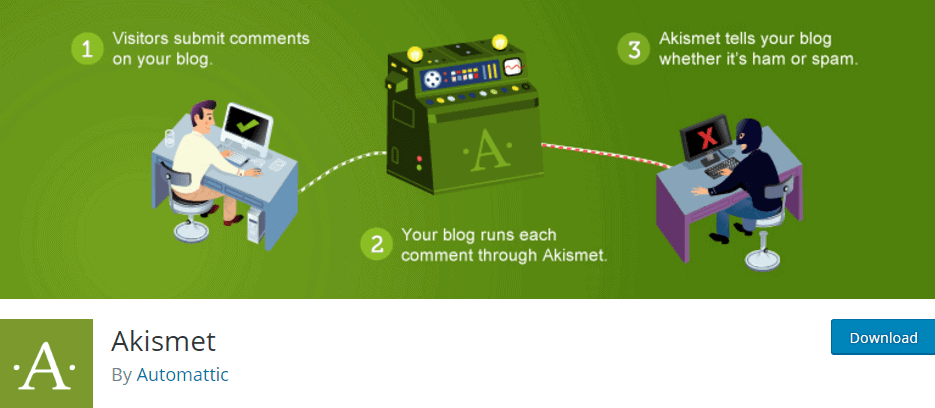
- Akismet is a plugin that will help reduce spam to your site. Spam can slow down your site and make it difficult for visitors to find.
- Google Analyticator is a plugin that helps connect your site to Google Analytics which is where you can find performance statistics for your site.
- W3 Total Cache is another plugin which helps speed up your site, something Google looks for when it is ranking websites.
- WP-DB Manager is a plugin that helps you backup your site. Always a good idea
- Conditional CAPTCHA for WordPress helps Akismet stop spammers. This plugin provides a CAPTCHA when a comment appears to be spam.
- Contact Form 7 creates a simple contact form so that your visitors can reach you through email from your site.
- Digg Digg is a plugin that places social media sharing icons in a sidebar which floats alongside of your post. This makes it easy for your readers to click and share your posts.
- FD Feedburner Plugin helps you manage your RSS feed.
#5. Register With Google Analytics
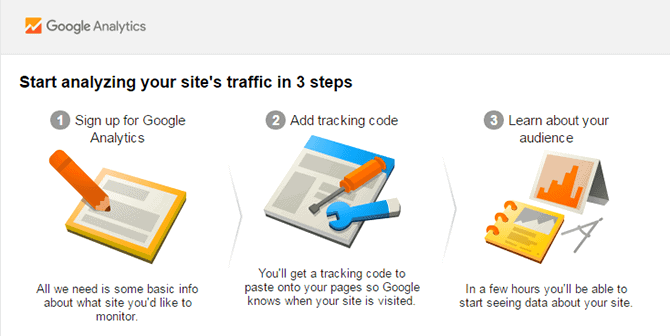
A Google Analytics account will help you track your visitors, which keywords they are using, how long they stay, what they are looking at, and where they are coming from. It also tells you which links they click.
All of this information helps you tweak your site and blog content to improve its performance.
You can use these statistics to target your audience with engaging content that will keep them on your site. They also tell you what is working and what is not, so you can refine your blogging methods.
#6. Register Your Blog With The Online Directories
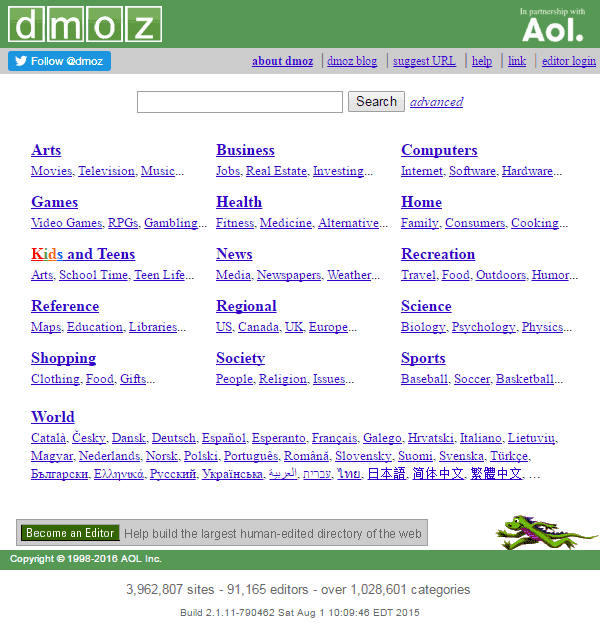
One of the best directories to use is Dmoz which is the largest and is edited and maintained by humans. Listing your blog on Dmoz can also help with your search engine rankings, especially Google since Google uses Dmoz results as part of its own directory. Only submit your site one time. It may take a while to get listed, but it will happen.
#7. Register Your Blog With Google, Bing, And Yahoo Webmasters

You will improve your site’s visibility by registering it with the webmasters for the three primary search engines. Registration will help the search engines recognize your site more quickly, telling the search engine to crawl it.
#8. Start An Email List And A Newsletter

For a successful travel blog, it is imperative that you have a robust email list and an engaging newsletter.
These help you deliver your content to your readers, helping build a loyal following who will keep returning to read your blog posts.
A newsletter and emails help you interact with your readers in a more personal way than just posting content. You can start building an email list with free email service and then as the list grows, move to a paid service.
#9. Write Your Content

Begin your blog by creating an About US page, a Contact page, a Home page with menu tabs, and a sitemap. Your goal is to create content that will attract a lot of visitors and this may be the very hardest part about how to start a travel blog excitement.
The way you can earn income from this is to work with companies and place their ads on your blog. When your visitors click on one of the company’s ads, you get a certain amount of money.
There are several ways to make money with your travel blog through Google AdWords and Pay-per-Click advertising with companies related to the travel industry.
To attract and keep readers, you must create engaging content that provides them something relevant. This may be information they need about a certain destination or tips for finding the best airline prices.
To earn and keep a high ranking within the search engines, your content must be refreshed and updated regularly. You will need to create new content at least twice a week, if not every day. It is also important for you to link your blog posts with all your social media platforms so your audience knows when you post something new.
Another important step is to take great photos of your travels and post them on your blog. Add captions and comments so your readers know where you were and how it affected you. Ensure the images are clear and crisp, even if you are taking them with a smartphone camera.
Research shows that many people will engage more quickly with an image than with text, so grab their attention with some great pictures and then hold it with your engaging content. Also, for blogging tips, you can read this article on how to write a blog post.
#10. Promote Your Blog

Even with fascinating content, your blog will not be successful without visitors. To help get visitors to your blog, you need to promote it. There are several ways to do this, including networking with other travel bloggers, commenting on travel forums, and routinely updating and sending out announcements on your social media platforms.
(Here is an awesome blog on how to promote your blog on Facebook)
Visit other successful travel blogs and comment on their posts. Join their email lists and get their newsletters. Tell them you like their content and ask if it’s okay if you give them a mention on your site. Include a link back to your blog in your comments.
Visit forums for travelers and travel specialists and engage with the community. Never spam these forums, because that is a sure way to get kicked off. Instead, make relevant comments and offer advice when you can. You can add a link to your blog in your signature block and it should fly as long as your comments are adding something to the forum discussion.
#11. Create Social Media Handles

When you are learning how to start a travel blog, one of your first steps must be to procure your social media handles for Twitter, Facebook, Instagram, Google+, and Pinterest. Keep your handle or name consistent on all of these platforms. Google+ will automatically use your name.
Conclusion
Learning how to start a travel blog is important before you write your first word. Choose the right blog and domain name and then select a good web hosting service. Set up your blog with a strong content management system so you can easily manage your blog and its content. Link your blog posts to your social media sites and then network to market and promote your travel blog.
Following these steps will help you create and grow your travel blog. Before you know it, you will have visitors who keep returning to stay up to date on where you’ve been.
Leave a Reply