Yes, you have heard it right!
With the wide availability of WordPress hosting in India, almost all hosting providers offer 1-click WordPress installation feature. WordPresss is of the most powerful Content Management Systems (CMS) on the internet today and manually installing WordPress on Bluehost is also an easy task and can be done in under 5 minutes.
How To Manually Install WordPress On Bluehost in Under 5 Minutes?
WordPress is the most loved CMS for building a blog or a website. Being open-source, you can download WordPress and install it in minutes. If you have purchased a web hosting from Bluehost and figuring out how to manually install WordPress on Bluehost, then this guide is for you. You can make use of the Bluehost app installer for quick WordPress install. However, if you want to take the long route, then this detailed guide on Bluehost WordPress install will help you do this task in under 5 minutes with 6 easy steps. Check it out!
How? I’ll get to it in a minute. But before we start, here are three things that you need:
- All your Login details for your hosting control panel.
- A good text editor.
- And an FTP client to upload your files.
Now, to install WordPress manually on Bluehost, you need to just follow this 6 easy steps.
Ready? Let’s get started!
#Step 1: Download The Updated Version Of WordPress
A] To begin with, you need to first download the updated version of WordPress.
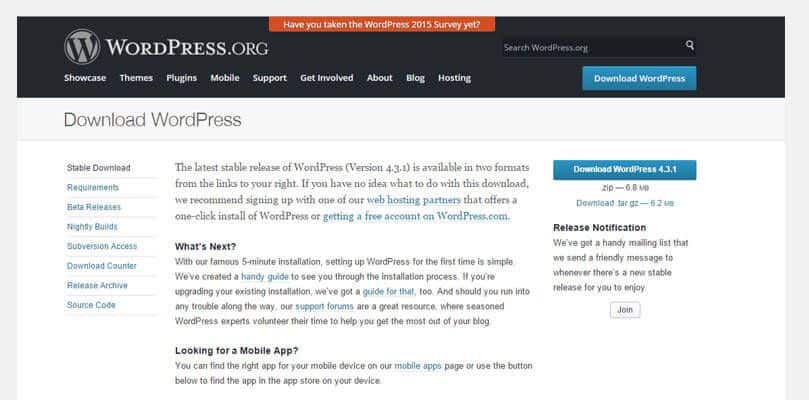
Click here to download. A zip file will be saved on your desktop. Unzip the file you have downloaded & save it in a new folder.
#Step 2: Create A Database For MySQL And A Username
A] Open a new browser and log into your Control Panel.
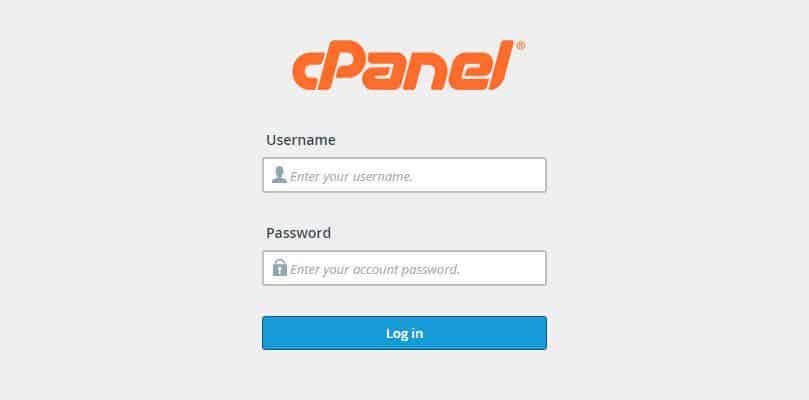
What is Control Panel?
A Control Panel is a hosting interface. Depending on your hosting provider, you might have a different interface, but usually most best web hosting providers in India, provide with cPanel interface.
Since, I’m using Bluehost, which comes with an inbuilt cPanel, we are going to use the tools available in it.
B] Go to the database section in cpanel and select MySQL Database wizard.
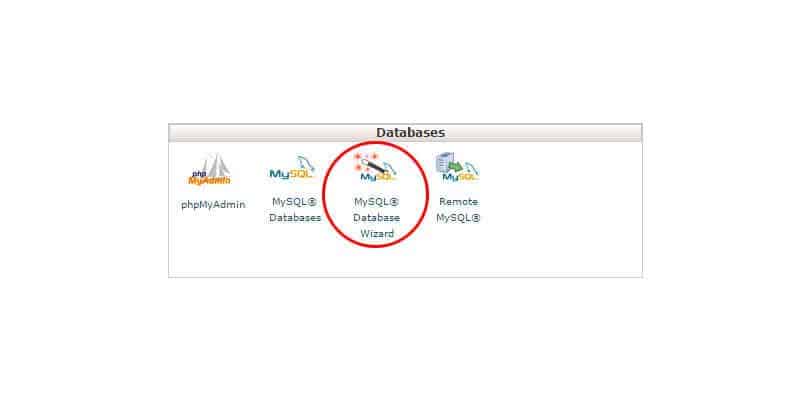
C] Follow these three steps to create a new Database:
- I. Once you click on MySQL Database wizard icon, a window will open up, type in your New database name and click on Next Step.
- II. Here, enter a new username & password and click on Create User.
- III. Lastly, Click on all privileges. This will allow the user (i.e. You) and WordPress to access information from the database. Click on Next Step.
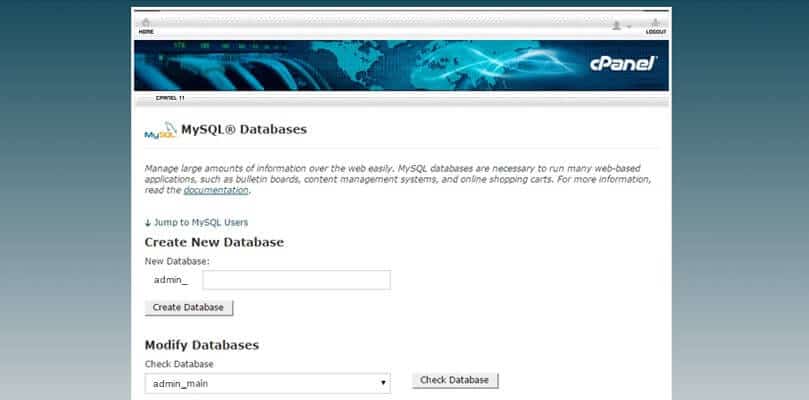
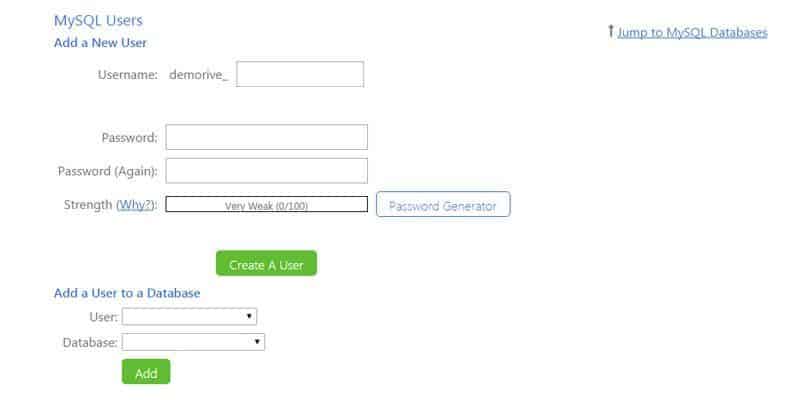
Also, don’t forget to make a note of the new database name, username & password. You will need it for the final process.
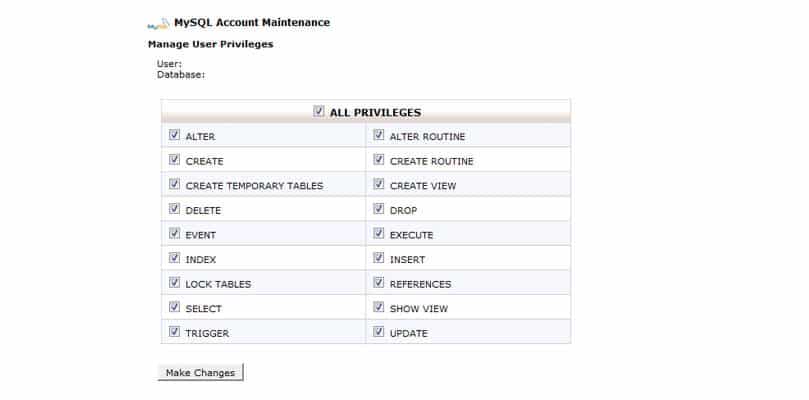
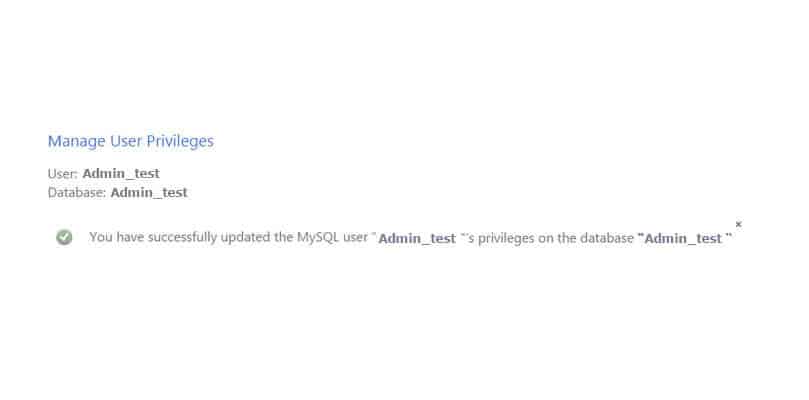
D] A window will open up, stating that you have completed the task.
#Step 3: Upload WordPress Files On Your Hosting Server
To upload WordPress File, you could either use cPanel or any other FTP client like Filezilla. In our case, we are uploading the WordPress File via cPanel.
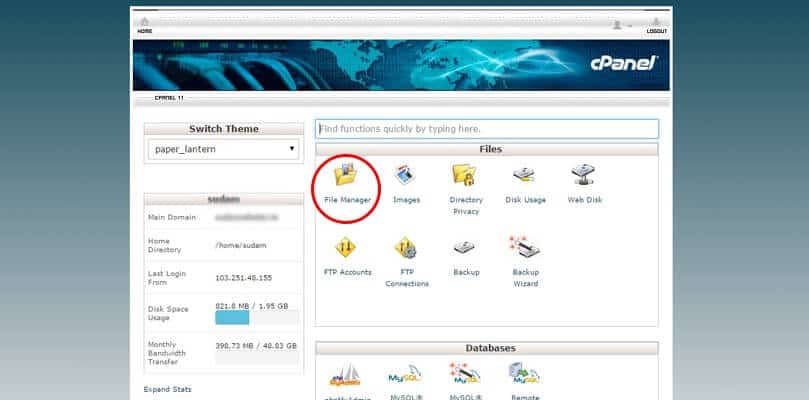
A] Login to cPanel and under the Files section, click on File Manager.
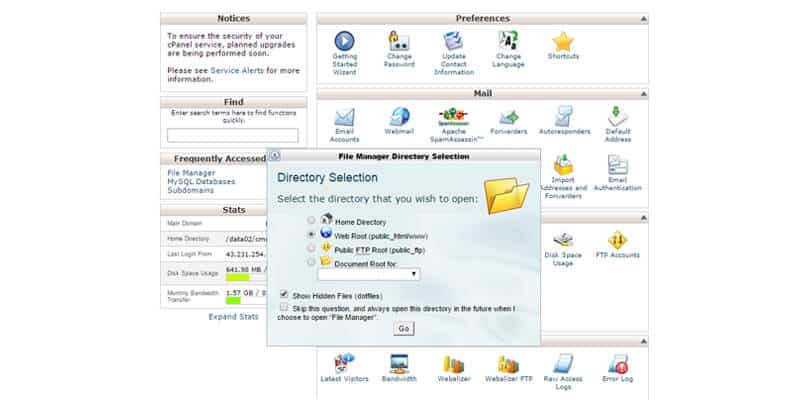
B] A pop-up window will open, select Web root and Show hidden files. Click on Go.
C] Next, select the upload icon. Click on the browse button to upload a file. Select the WordPress zip file which you have previously saved (in Step 1) and click on Open.
![]()
D] You will now see the WordPress zip file in the directory. Select the zipped file and click on the extract icon on top.
![]()
E] A pop-up window will open, select Extract Files and once the process is done, click on Close.
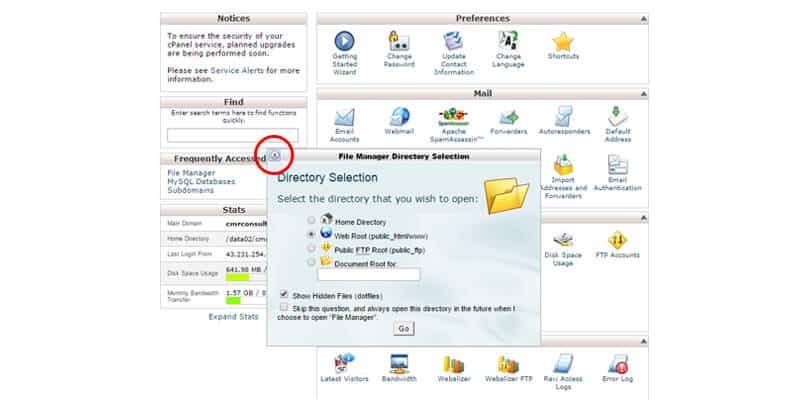
Another WordPress folder will be created in the directory, delete the original one.
#Step 4: Configure wp-config.php File On Server
A] Double click, to open the newly saved WordPress file. This will contain a file called wp-config-sample.php.
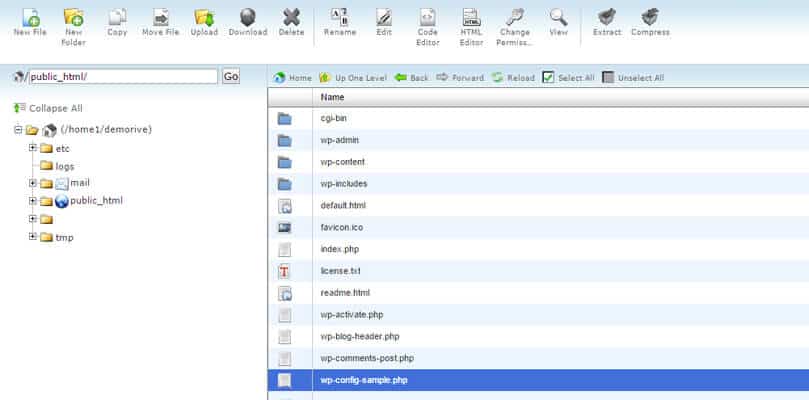
B] Right click on wp-config-sample.php and rename it to wp-config.php and click save.
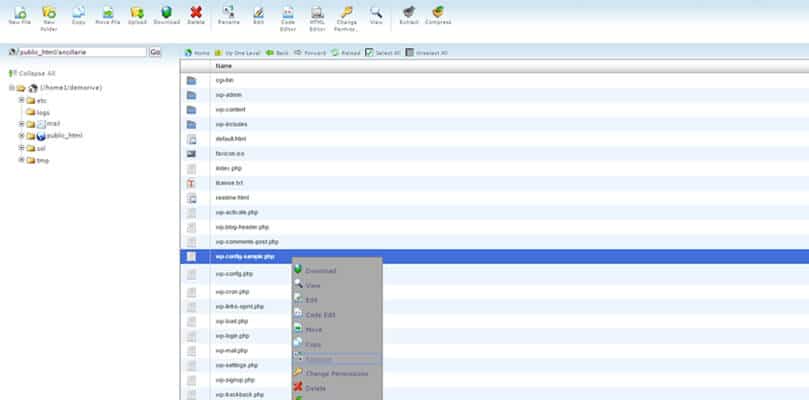
C] Next, right click on wp-config.php file and select Code Edit.

D] Once the file is opened, look for the following information.
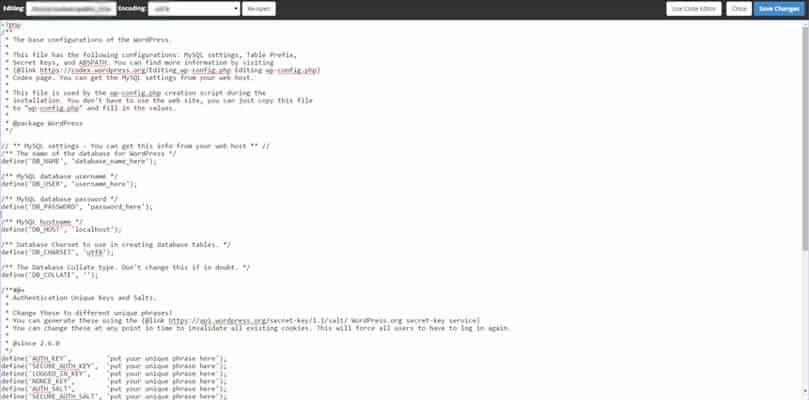
#If you want, you can copy the following text in a notepad and make the required changes. Further, once you locate the following text:
- I. Replace the database_name_here text with the new database name you have created. [See. Step2 (C) point ii]
- II. Similarly, replace the username and password, with new names.
- III. Finally, save the changes you have made, before closing the file.
#Step 5: Connect WordPress To Your MySQL Database
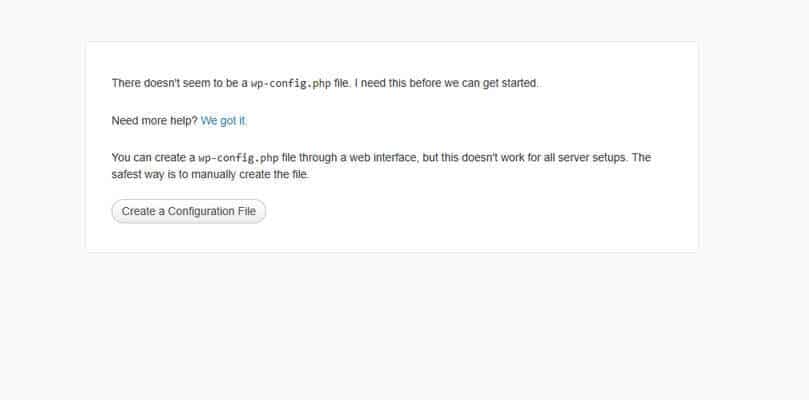
A] Now, open your domain eg. in a new browser and you will see the following message on your screen. Click on Create a Configuration File.
B] Next, you will come to this page. Click on Let’s Go, to proceed further.
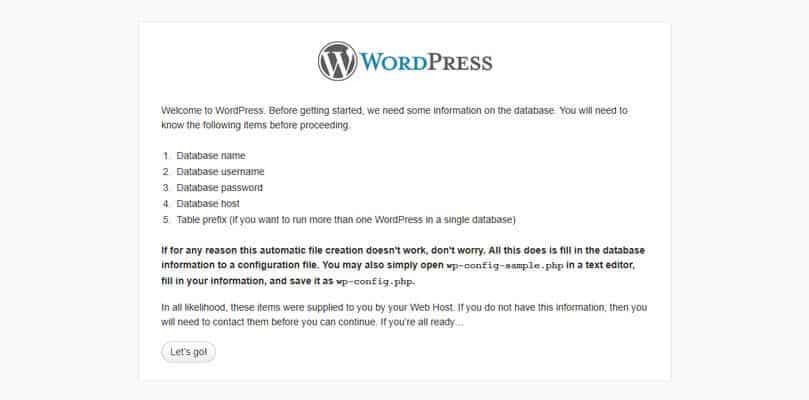
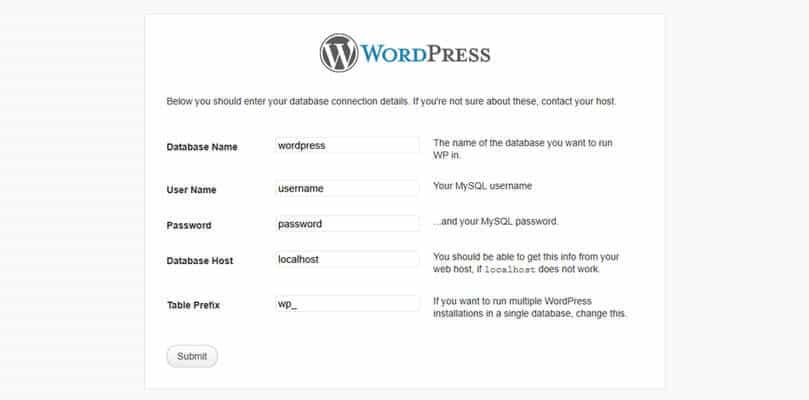
C] Below, you need to enter your new Database Details and click on Submit.
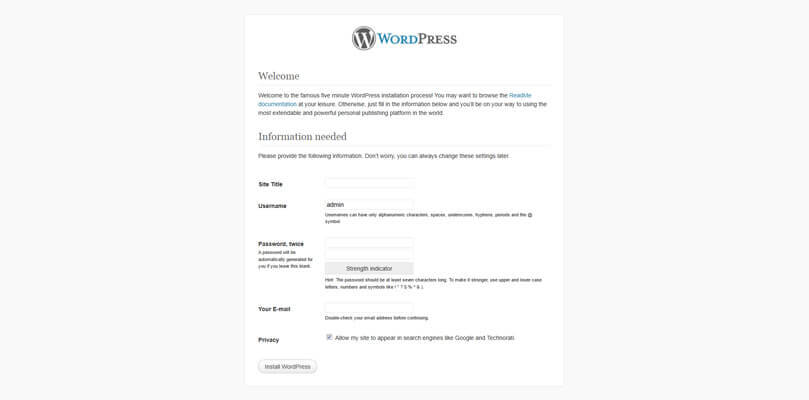
#Step 6: Complete Installation By Entering Username and Title Of Your Site
A] Here, enter all your database details accurately and click on Install WordPress
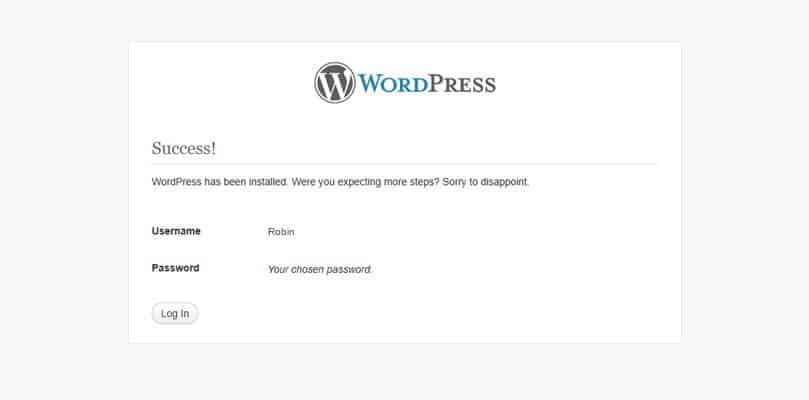
B] You will see another message “Success”, along with an invitation to Login.
#Conclusion
Here you go! A step-by-step guide on how you can install WordPress on Bluehost in under 5 minutes.
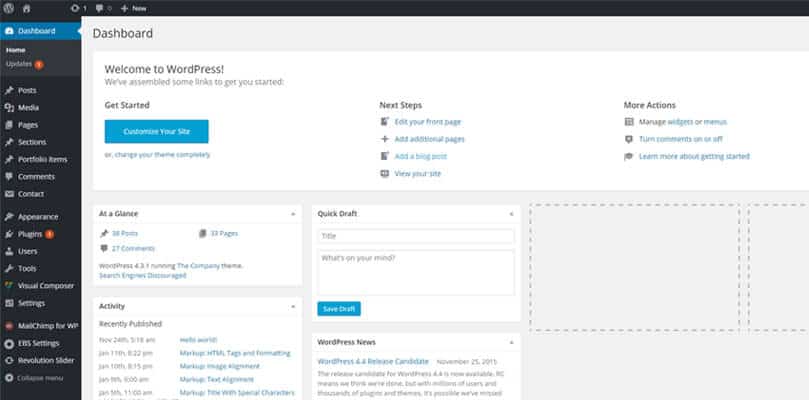
Here is an example of how your new WordPress dashboard will look
Since Bluehost is touted to be one of the top-notch companies in the web hosting industry, (read this Bluehost review to why), installing WordPress on Bluehost is supremely easy thanks to its interactive cPanel.
However, for beginners, it might take a little longer to install WordPress. But, just follow this effective guide and you will have your WordPress installed & running in no time! Also, here is a WordPress Backup guide that will come in handy once you install and start using WordPress. Do check it out!
As always, if you are planning on buying hosting for your new blog or website, then don’t forget to make use of Bluehost coupon, to get a maximum discount. Moreover, here is a complete guide on how to buy web hosting from Bluehost for faster web hosting purchase.
Got any queries regarding WordPress installation? Let me know in the comments below!
Leave a Reply